On this page you will learn everything about the calculation of roofing material in the offer.
2. Modifying the optimization results for roof tiles
3. Modifying the optimization results for trapezoidal sheets and panels
4. Modifying the optimization results for the modular roof tiles
5. Adaptation of the results with the mouse
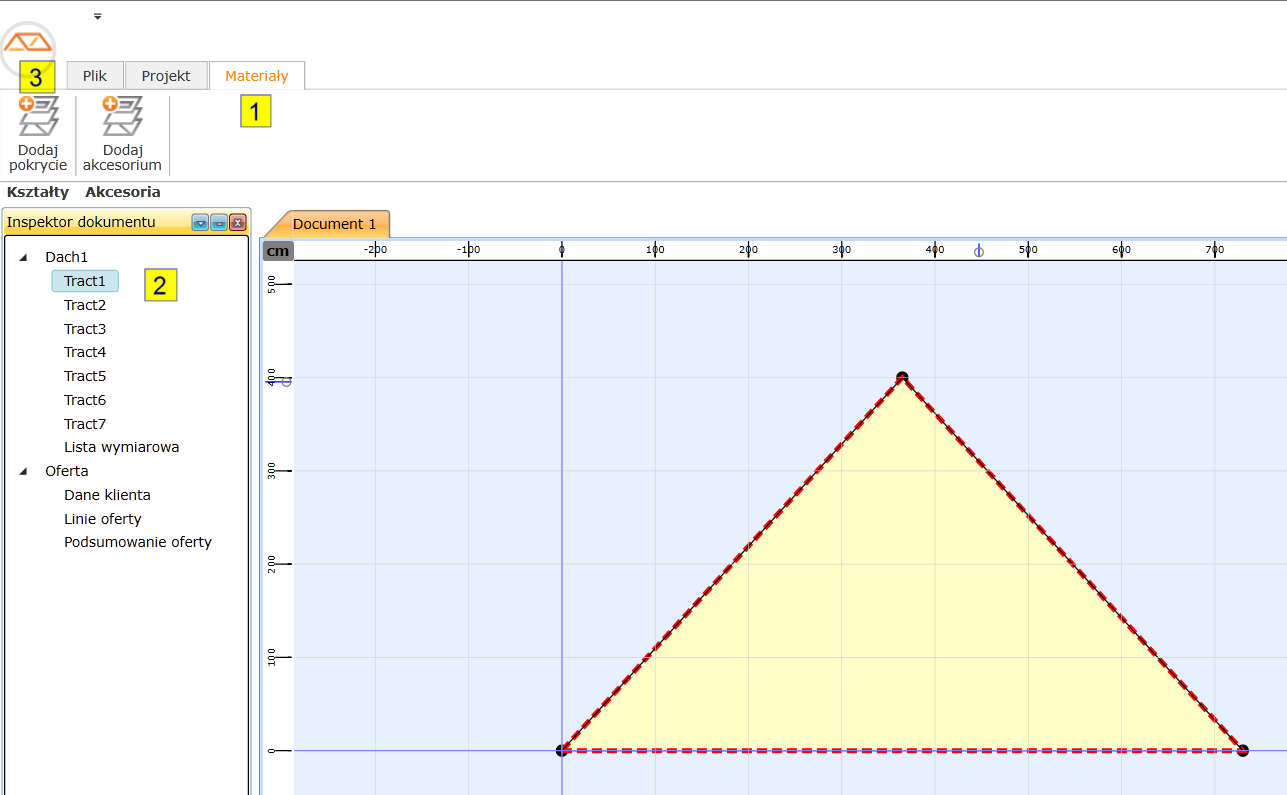
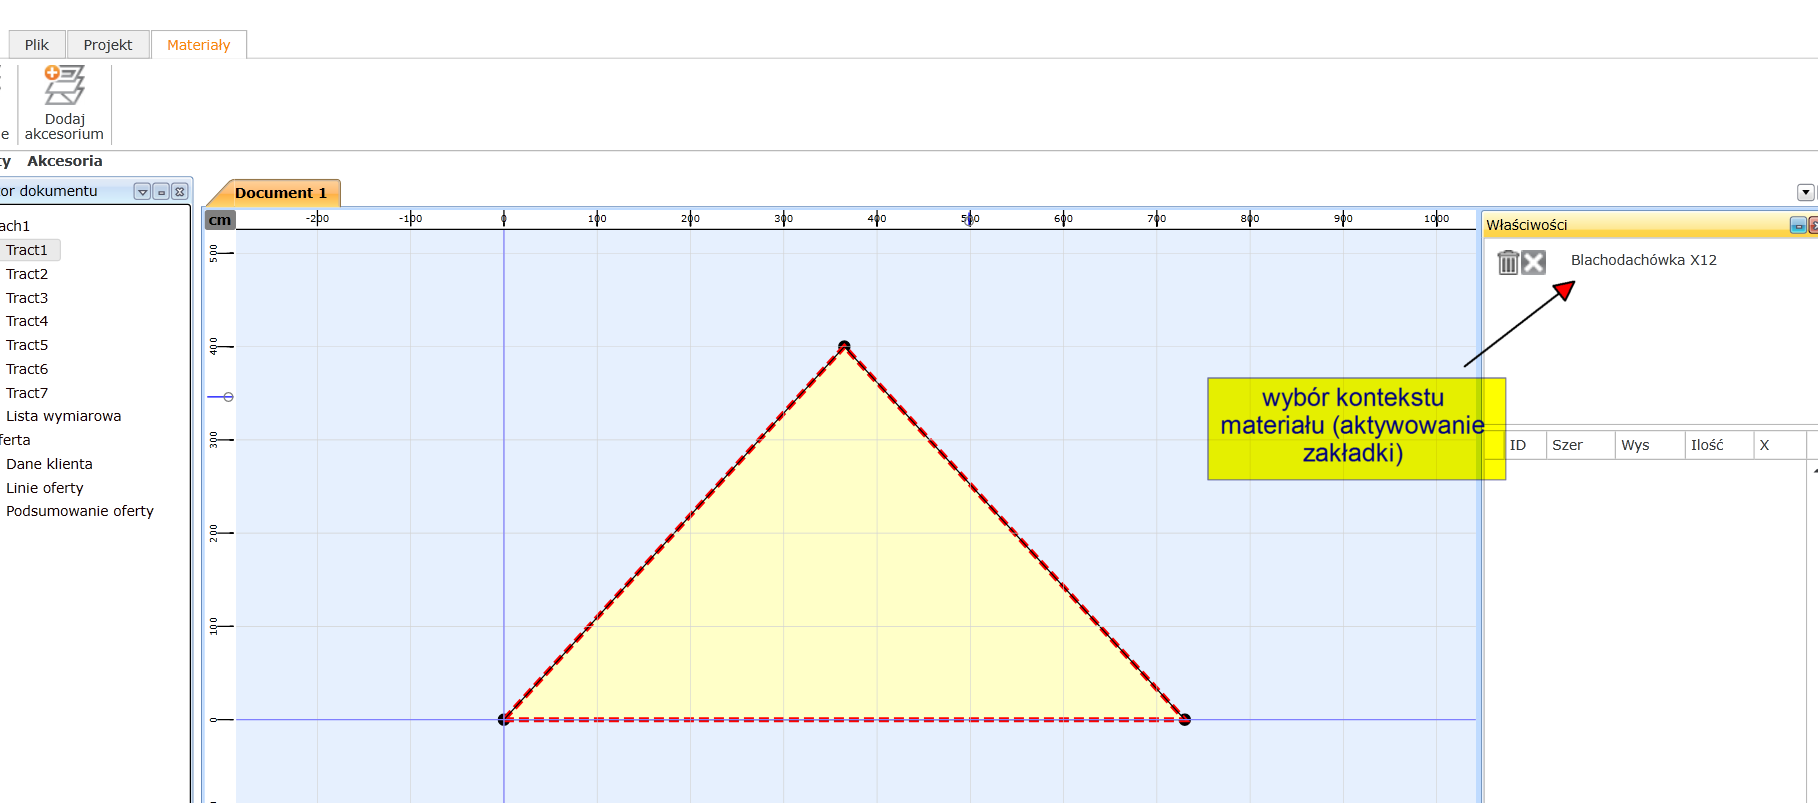
1. Select the tab Materials
2. Select any slope if it has not been selected by default
3. Press "Add roofing"
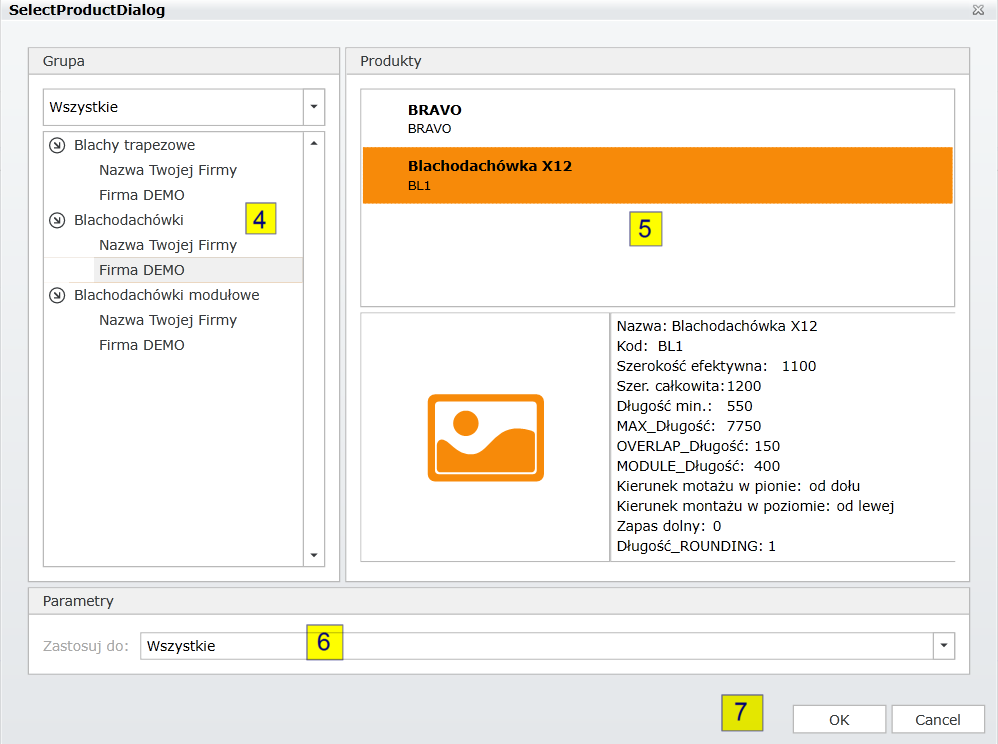
4. Select the type of roofing and the manufacturer
5. Select the product from the list
6. If the roofing is to be applied to all slopes, the parameters in "Apply to" should have the value "All". If it is to be applied only to the current slope, select the name of the slope.
7. Select OK
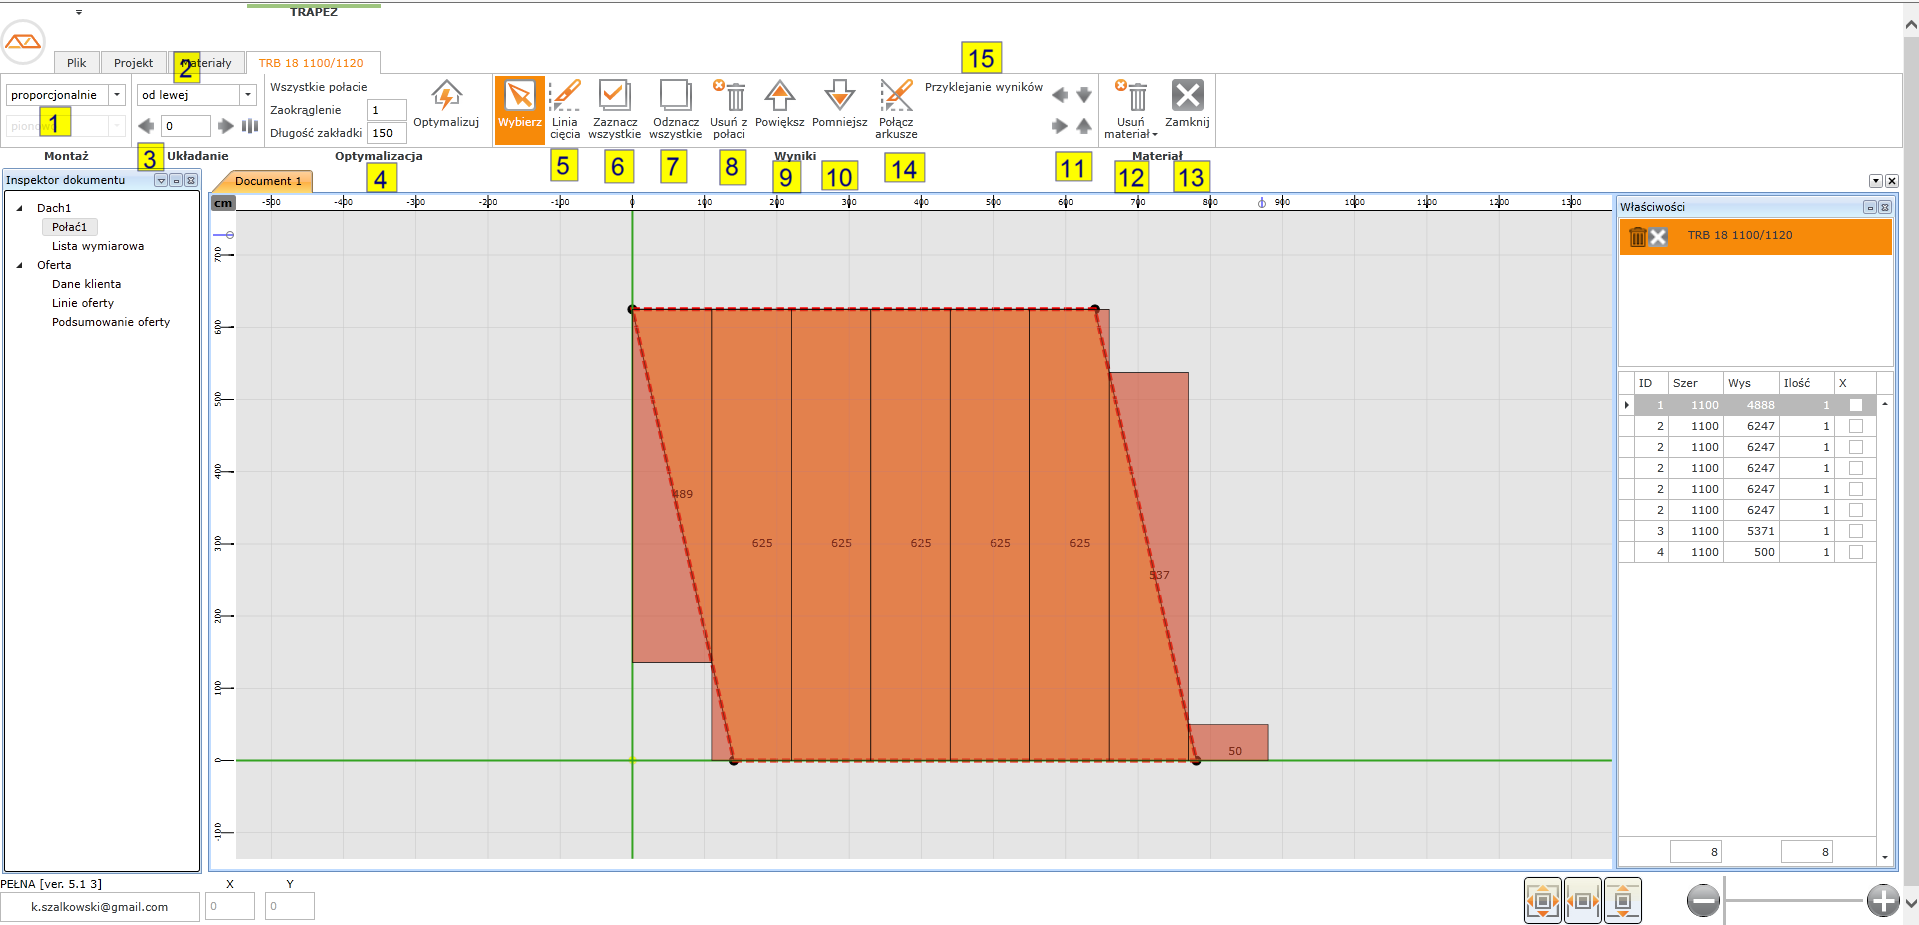
The results of the calculation of material requirements can be corrected on the drawing of slope assembly. For each product added to the offer a separate tab with parameters and options that allow the user to adapt optimization to customer's needs will appear.

Among available options for metal roof tiles are:
Assembly
1. A method of vertical assembly - it specifies how to select sheets when the length of slope is greater than the maximum length of roof tile sheet.
Installation
2. The method of horizontal installation – it determines from which side; left or right, assembly is performed
3. Horizontal shift / centering
Optimization
4. Optimization - each change of coverage parameters requires the implementation of optimization. Changing the parameter not using the optimization button is indicated by an asterisk next to "Optimize"
Results
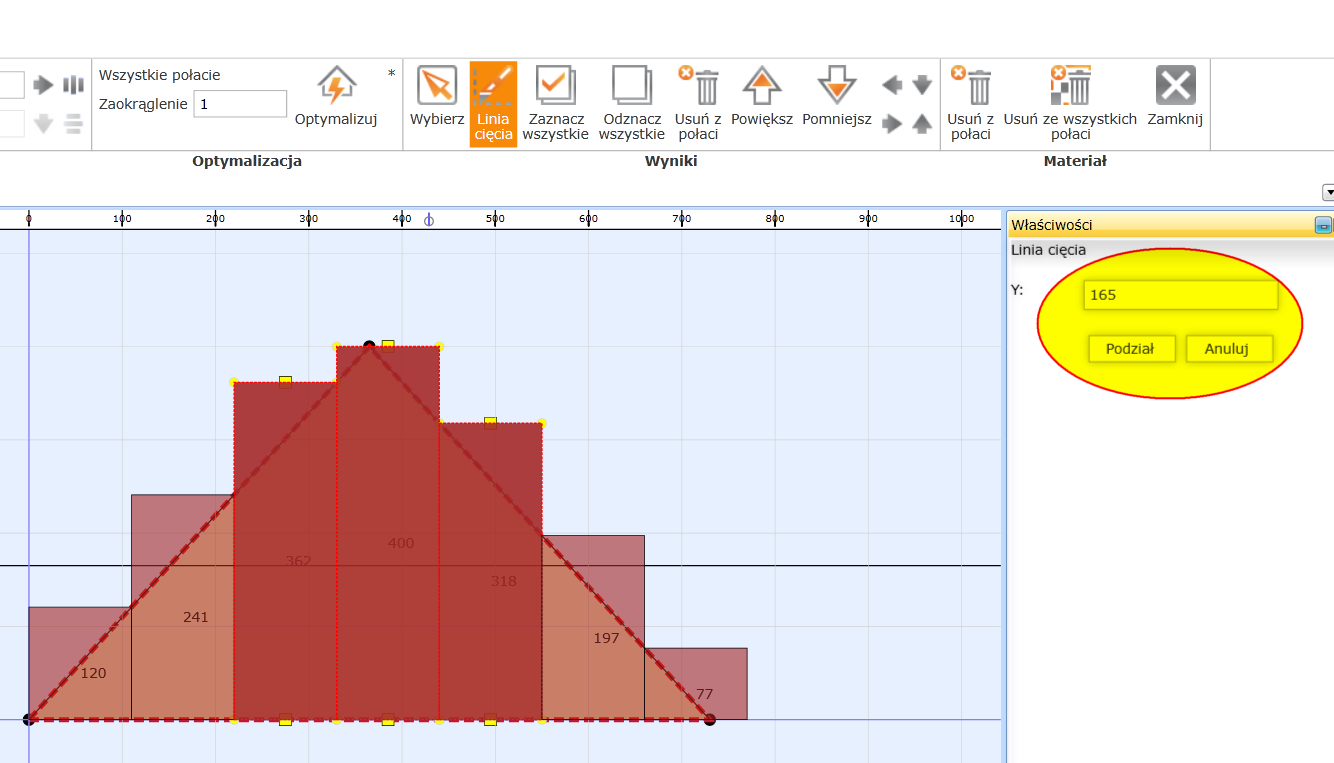
5. Cutting line - this tool allows you to split the sheets horizontally. If the selected sheets are in the line, only these sheets will be divided. In the absence of marked sheets, all in the line will be split. After selecting a tool and identifying the division, select Divide

6. Select all – this function marks all sheets on the selected slope.
7. Deselect all - the function deselects all sheets on the selected slope.
8. Remove from slope - this option removes marked sheets from the selected slope
9. Zoom in – it enlarges marked sheets by a module
10. Zoom out – it reduces marked sheets by a module
11. Arrow keys to move sheets - these functions allow you to move marked worksheets (up, left, right and bottom). In addition to the buttons on the toolbar, you can also use keyboard shortcuts - holding CTRL plus arrow keys
Material
12. Remove from slope - removes all material from selected slope
13. Remove from all slopes - removes all material from all slopes
14. Close - closes the context tab of material. To activate the tab of the particular material select material from the list

The results of the calculation of material requirements can be corrected on the drawing of slope assembly. For each product added to the offer a separate tab with parameters and options that allow the user to adapt optimization to customer's needs will appear.
The "snapping" option
Assembly
1. A method of vertical assembly - it specifies how to select sheets when the length of slope is greater than the maximum length of roof tile sheet.
Installation
2. The method of horizontal installation – it determines from which side; left or right, assembly is performed
3. Horizontal shift / centering
Optimization
4. Optimization - each change of coverage parameters requires the implementation of optimization. Changing the parameter not using the optimization button is indicated by an asterisk next to "Optimize"
Results
5. Cutting line - this tool allows you to split the sheets horizontally.
If the marked sheets are in the line, only these sheets will be divided. In the absence of marked sheets, all in the line will be split. After selecting a tool and identifying the division, select Divide
6. Select all – this function marks all sheets on the selected slope
7. Deselect all - the function deselects all sheets on the selected slope.
8. Remove from slope - this option removes marked sheets from the selected slope
9. Zoom in – it enlarges marked sheets by a module
10. Zoom out – it reduces marked sheets by a module
11. Arrow keys to move sheets - these functions allow you to move marked worksheets (up, left, right and bottom). In addition to the buttons on the toolbar, you can also use keyboard shortcuts - holding CTRL plus arrow keys
14. The ability to connect marked sheets vertically
15. Sheet "snapping" mode. With the button ON, it is easier to change the position and size of sheets with the mouse. The lower and upper edge adapts to adjacent sheets.
Material
12. Remove material - removes material from the selected or all slopes
13. Close - closes the context tab of material. To activate the tab of the particular material select material from the list
The results of the calculation of material requirements can be corrected on the drawing of slope assembly. For each product added to the offer a separate tab with parameters and options that allow the user to adapt optimization to customer's needs will appear.
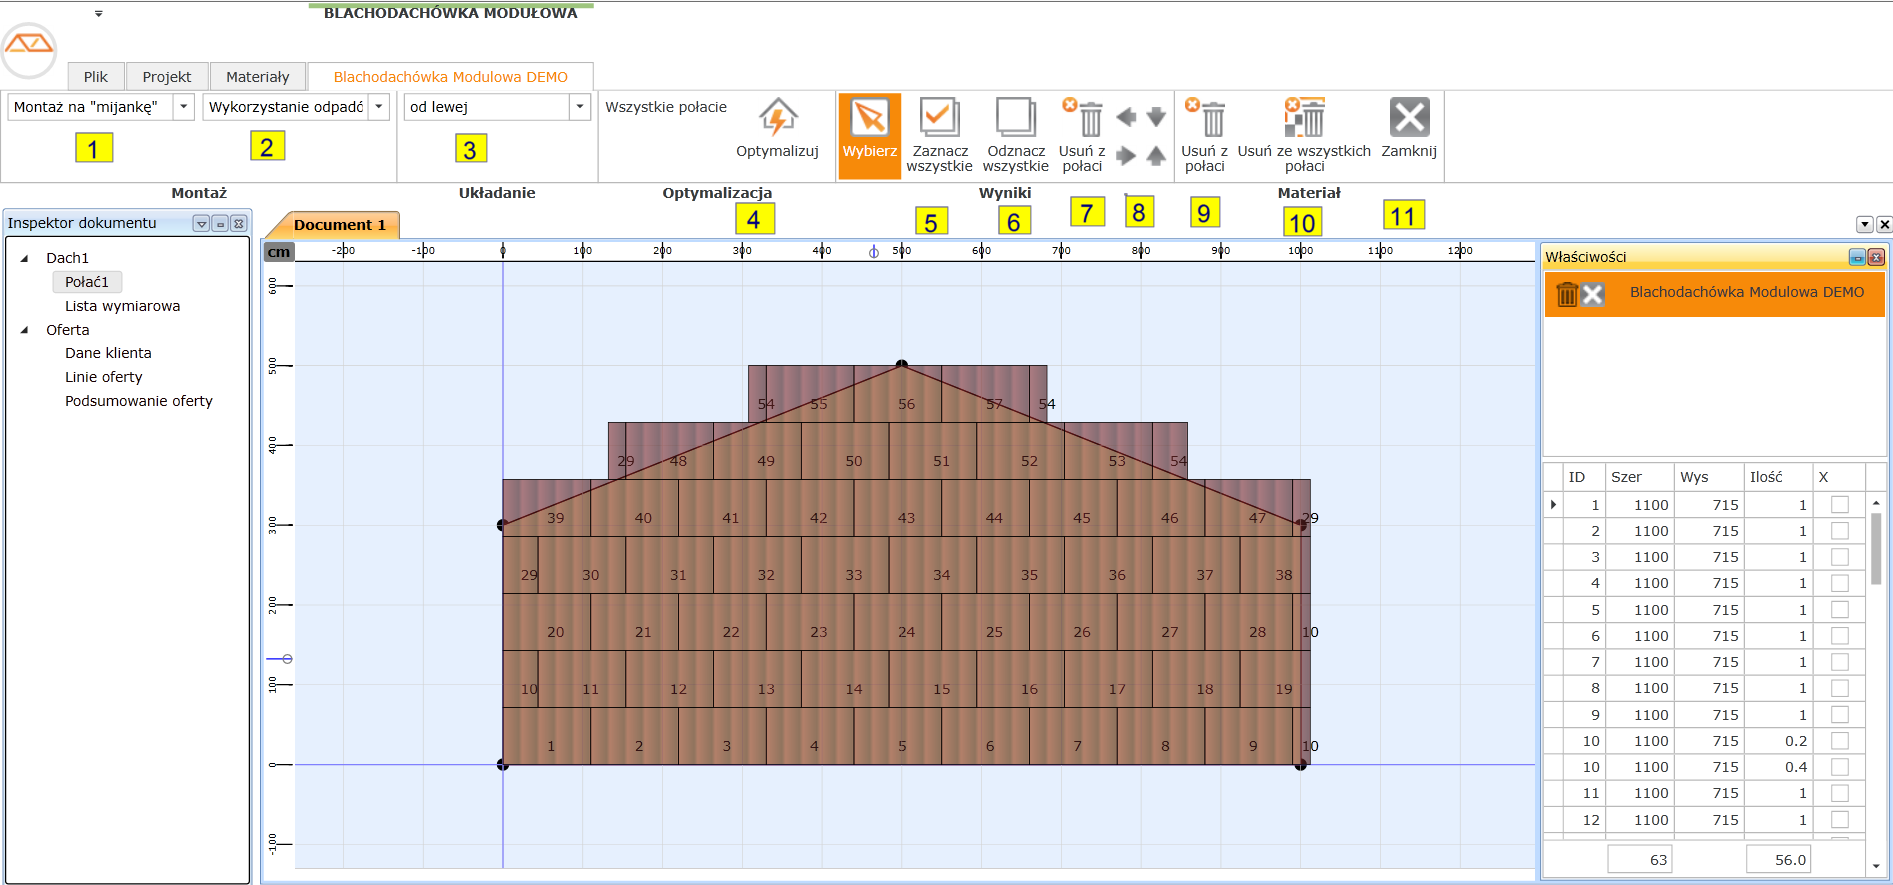
Among the available options for modular roof tiles are:
Assembly
1. Type of installation
2. Waste management - is the system to use waste for optimization
Installation
3. The method of horizontal installation – it determines from which side; left or right, assembly is performed
Optimization
4. Optimization - each change of coverage parameters requires the implementation of optimization. Changing the parameter not using the optimization button is indicated by an asterisk next to "Optimize"
Results
5. Select all – this function marks all sheets on the selected slope.
6. Deselect all - the function deselects all sheets on the selected slope.
7. Remove from slope - this option removes marked sheets from the selected slope
8. Arrow keys to move sheets - these functions allow you to move marked worksheets (up, left, right and bottom). In addition to the buttons on the toolbar, you can also use keyboard shortcuts - holding CTRL plus arrow keys
Material
9. Remove from slope - removes all material from selected slope
10. Remove from all slopes - removes all material from all slopes
11. Close - closes the tab of context of the material. To activate the tab of the particular material select material from the list
